

Accent Wall: Defining Space
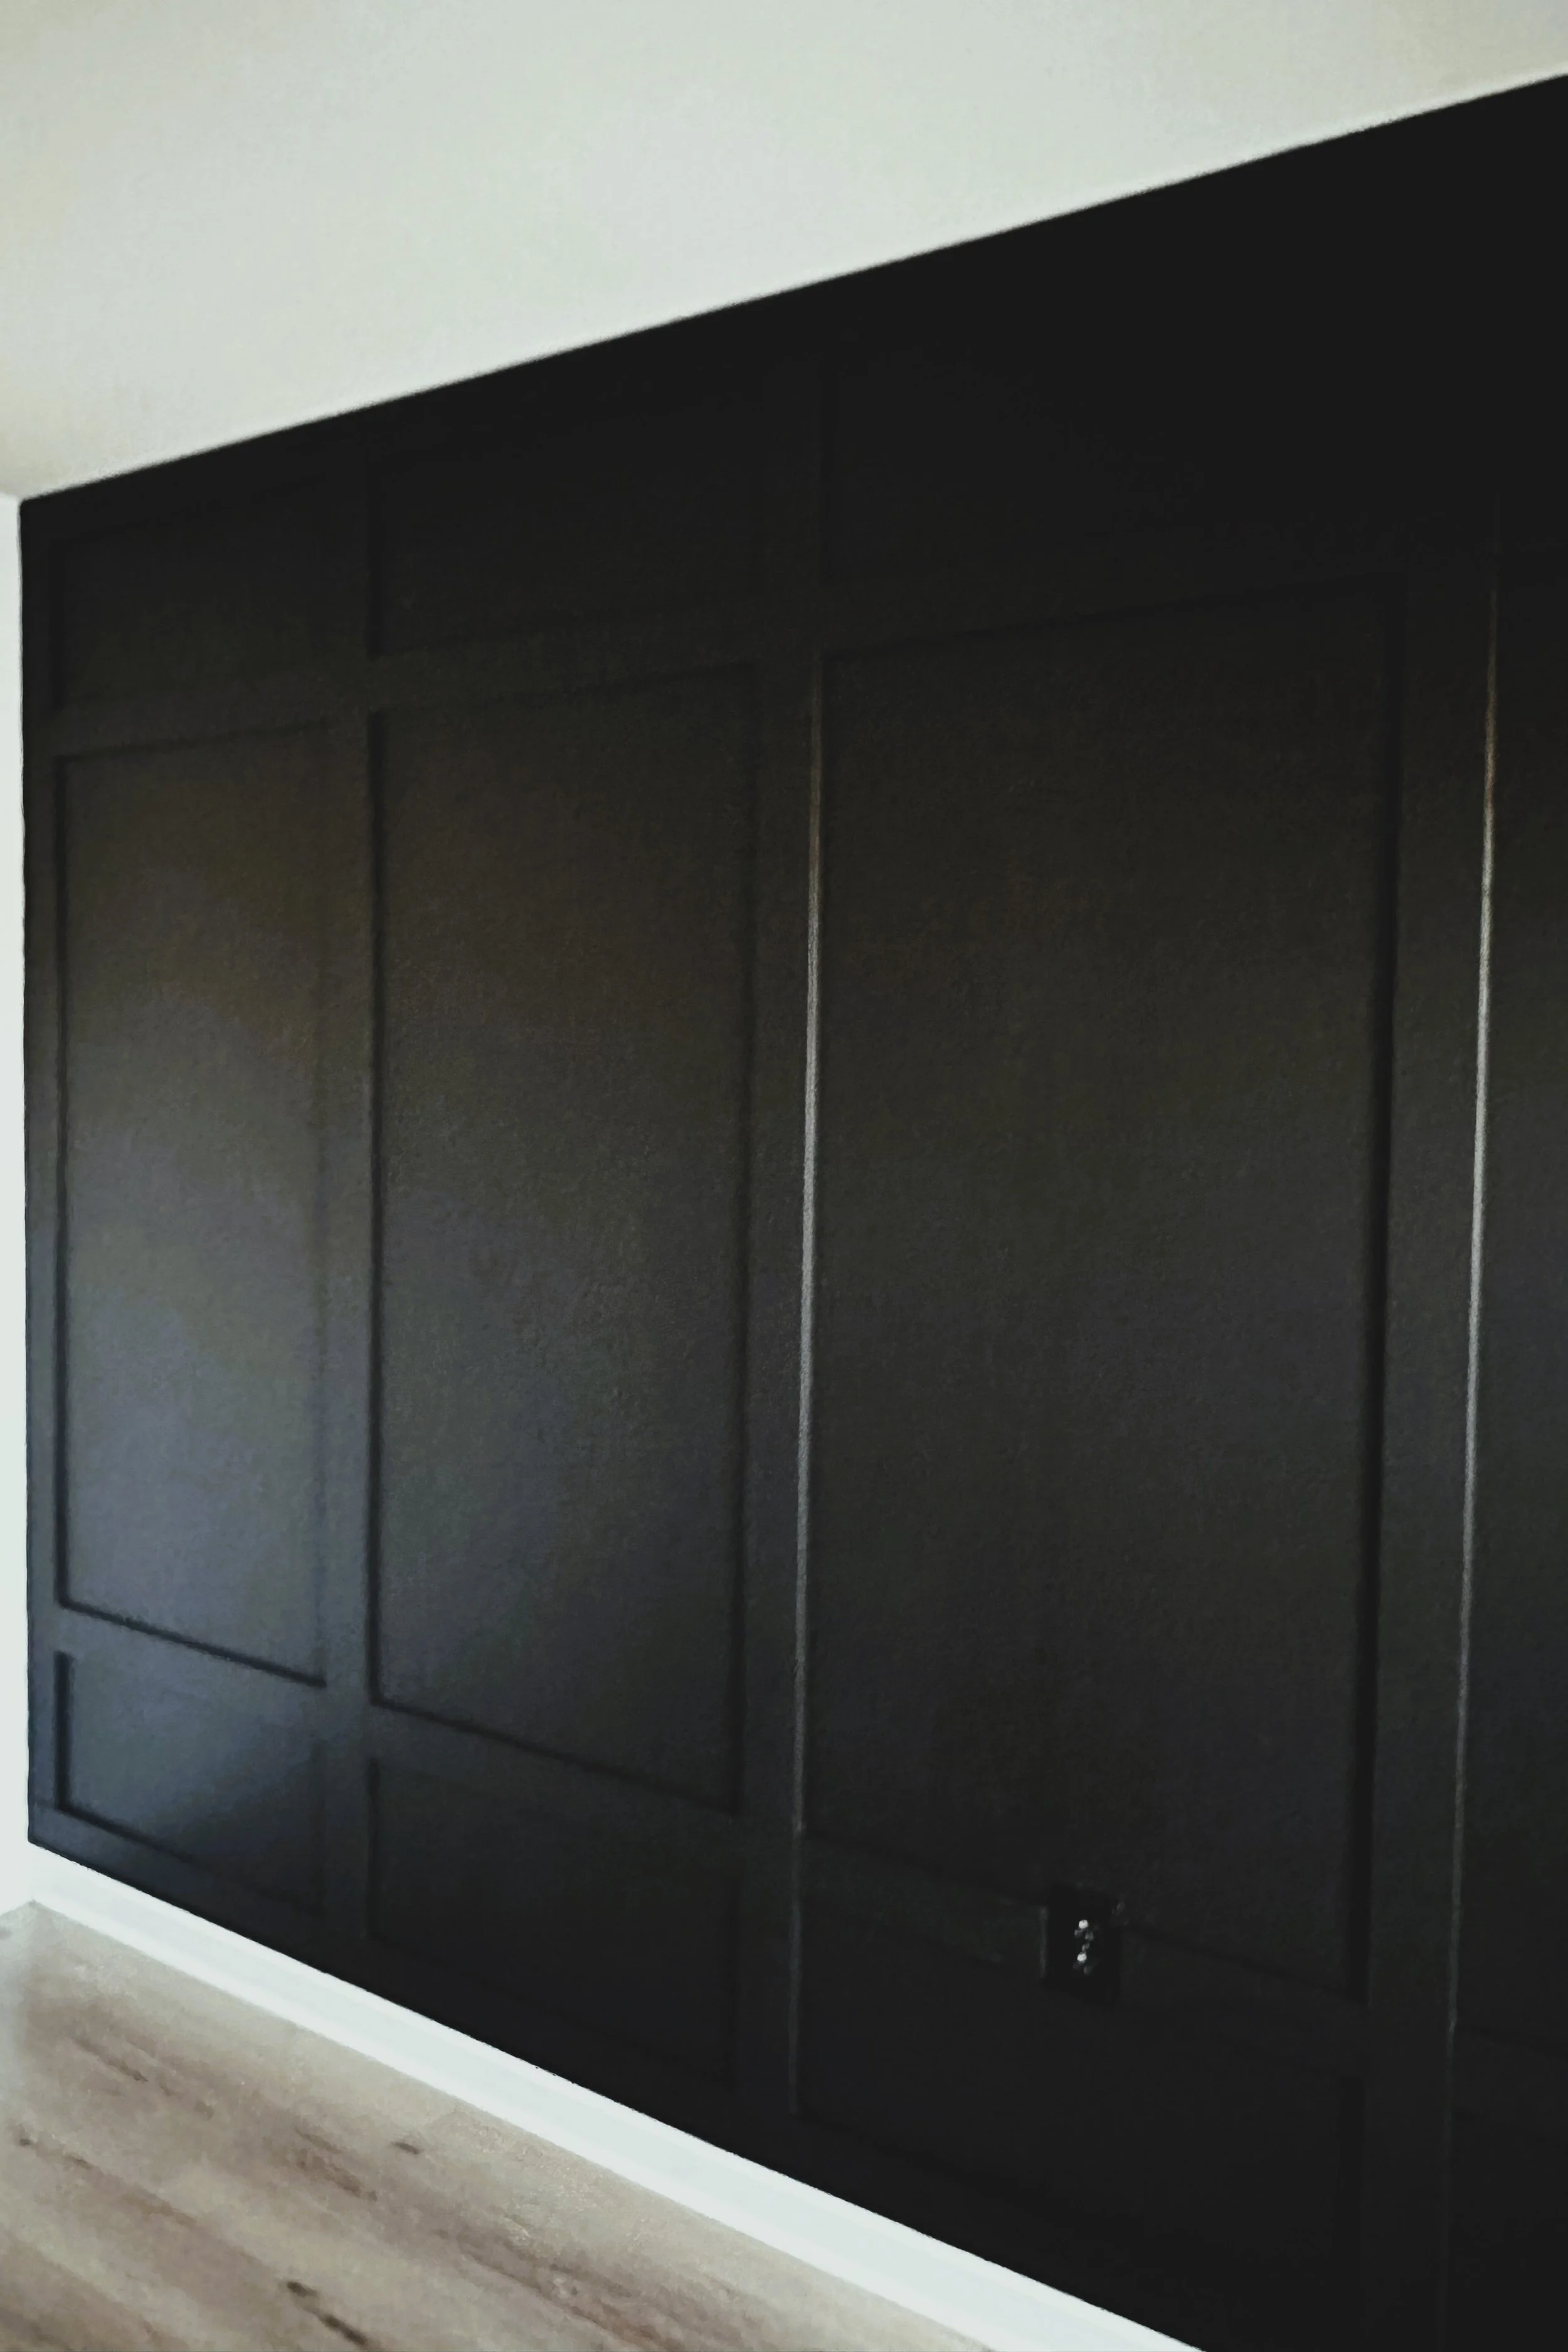
Board & Batten Style
Using drywall as your empty canvas coupled with MDF trim molding to create visual texture and character to a drab wall. This design is well suited for an office or bedroom.
Materials Needed (Note *Recommended):
3.25" MDF trim (length based on your wall measurements)
Measuring tape
Pencil
Level
Miter saw* (or hand saw)
Nail gun* (or hammer and finishing nails)
Wood filler
Sandpaper (120-220 grit)
Caulk and caulk gun
Paint (your choice of color)
Painter’s tape
Step-by-Step Instructions:
1. Plan Your Design
Choose a design: Decide the pattern (vertical, horizontal, geometric shapes like squares or rectangles).
Measure the wall: Measure the width and height to plan the placement of the MDF trim.
Sketch the layout: On paper, create a rough sketch of where you want to place the trim on the wall.
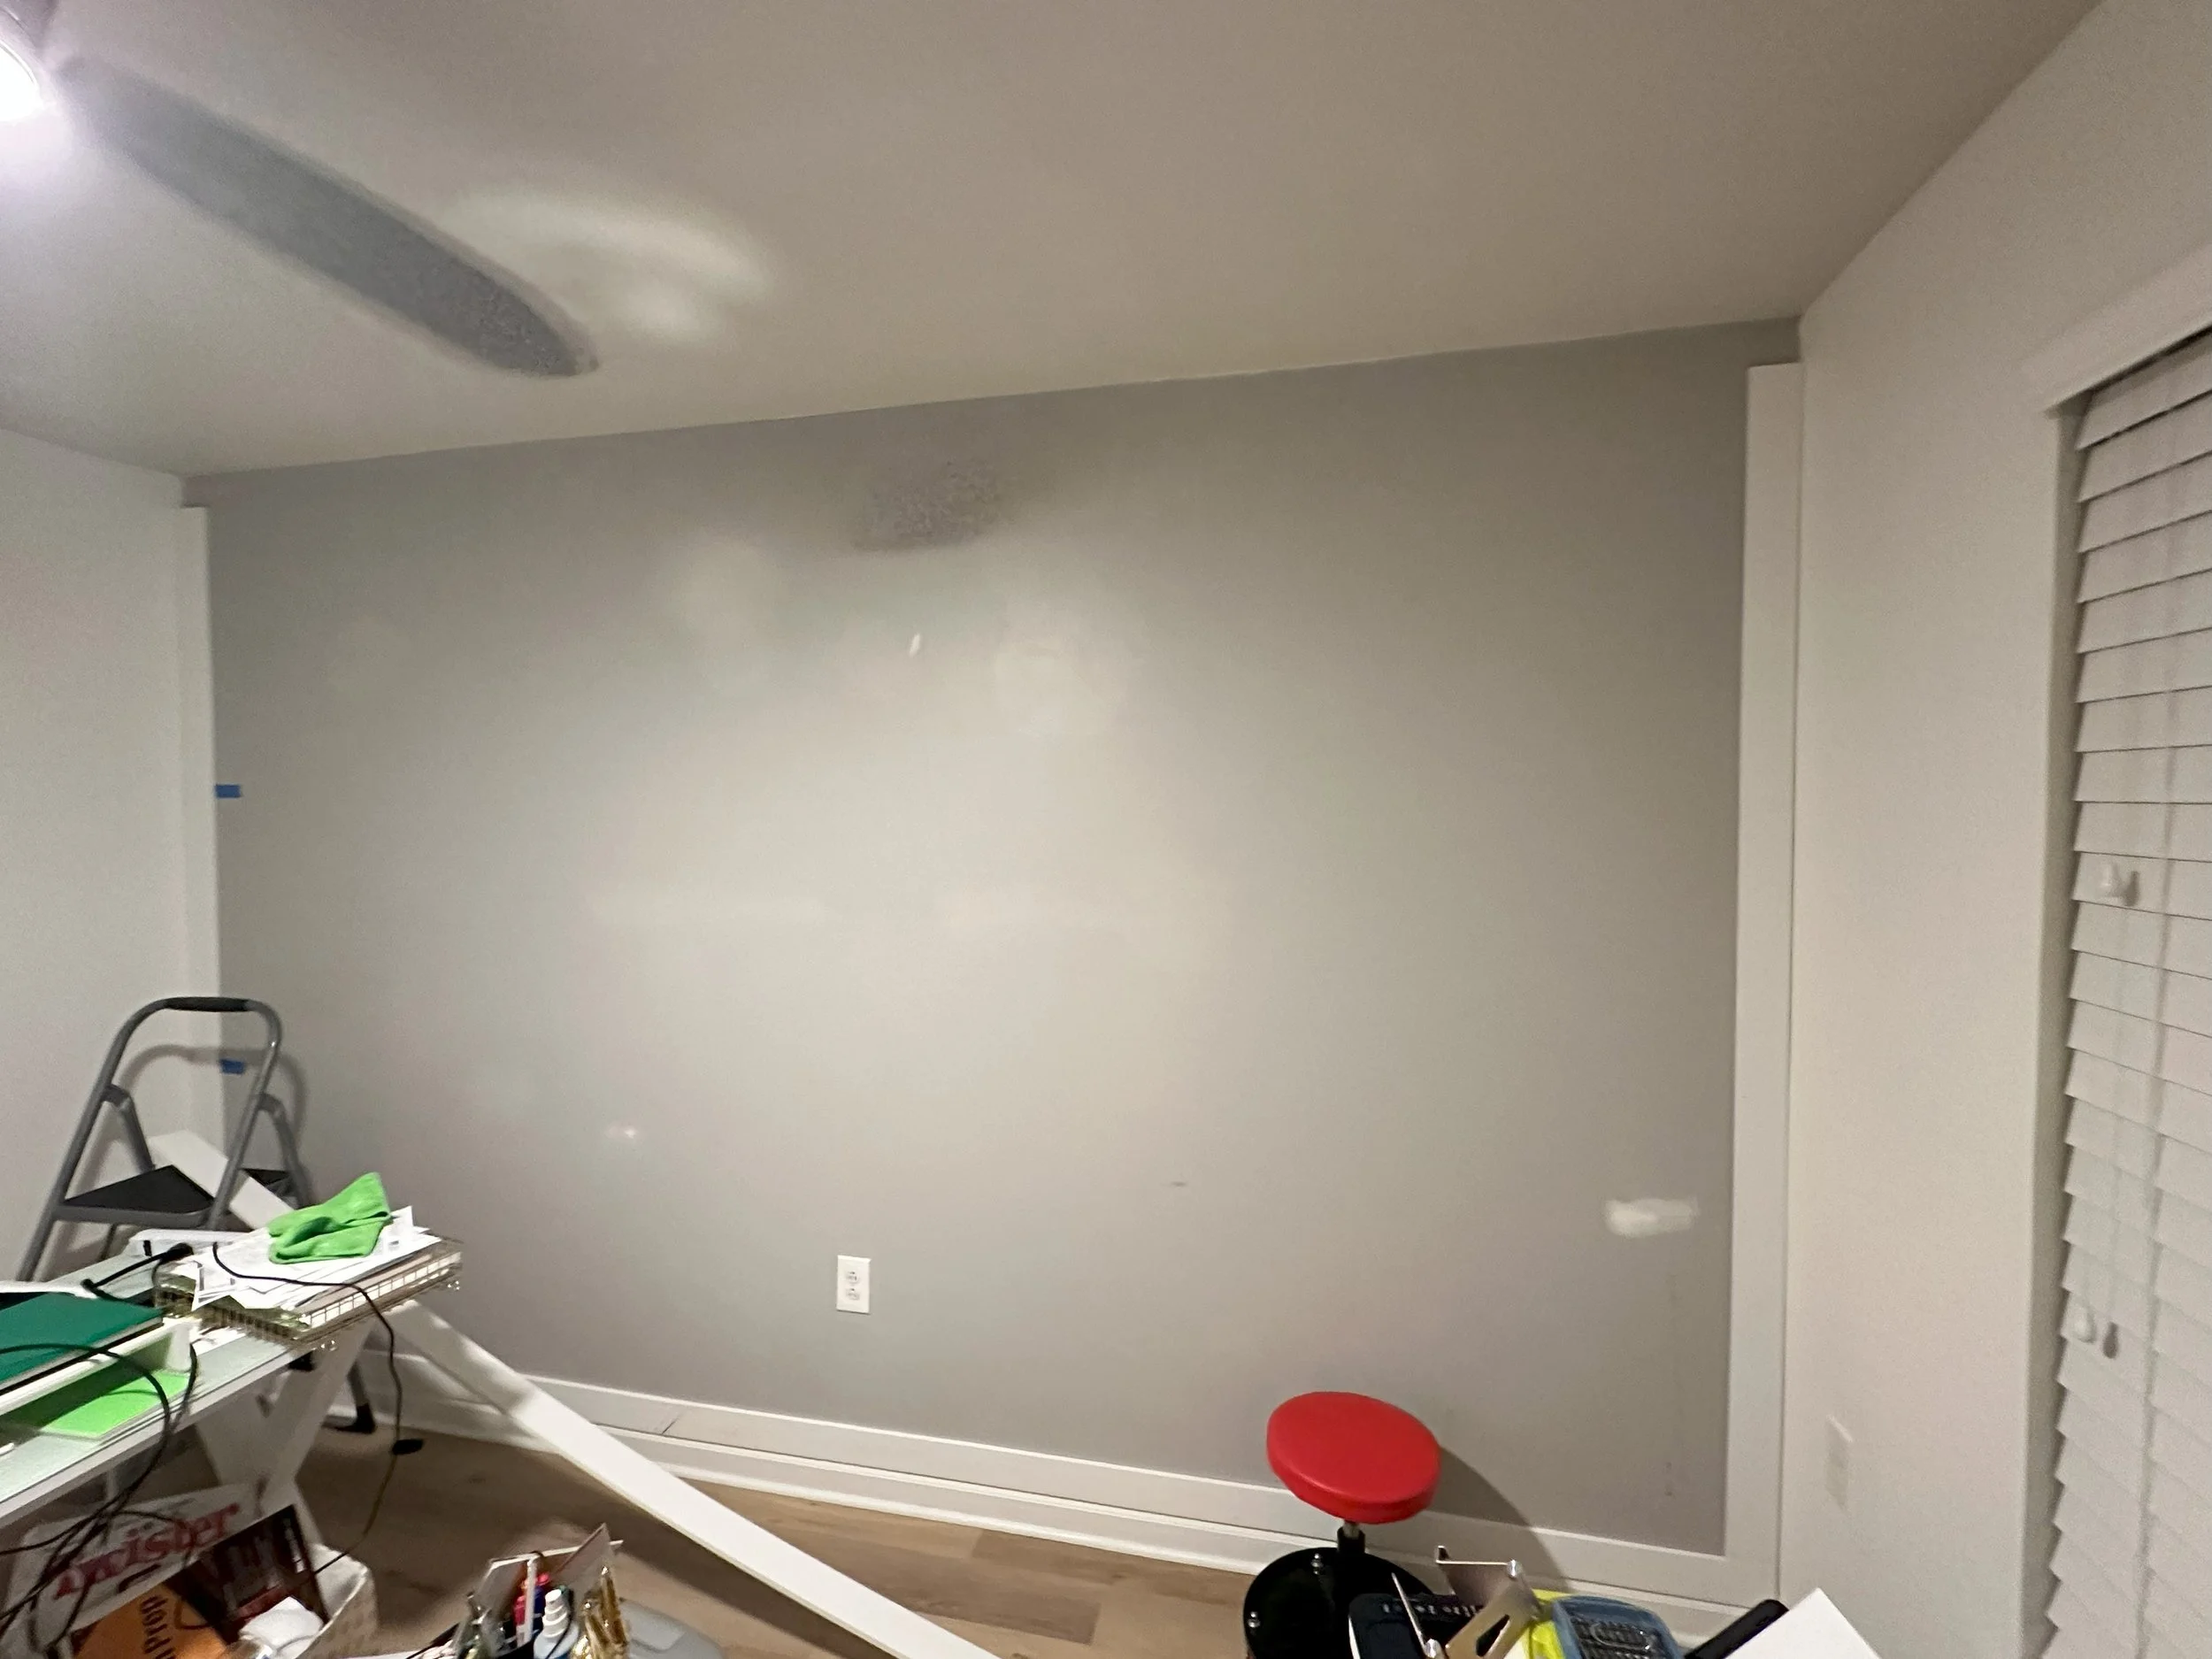
2. Prepare the Wall
Clean the wall: Wipe down the wall to remove dust and debris.
Optional: Mark your pattern: Use a pencil and level to lightly mark the pattern on the wall for accurate placement.
“Renegade Method” (what I choose): Measure and plot the distances by eyeballing with a strip of trim, then following up and deciding the proper measurement / inch width for your design. The good thing about only using nails is that you can remove without any damage. I would advise against using any liquid nails or construction adhesive. Too permanent and will cause drywall damage in the future removal.
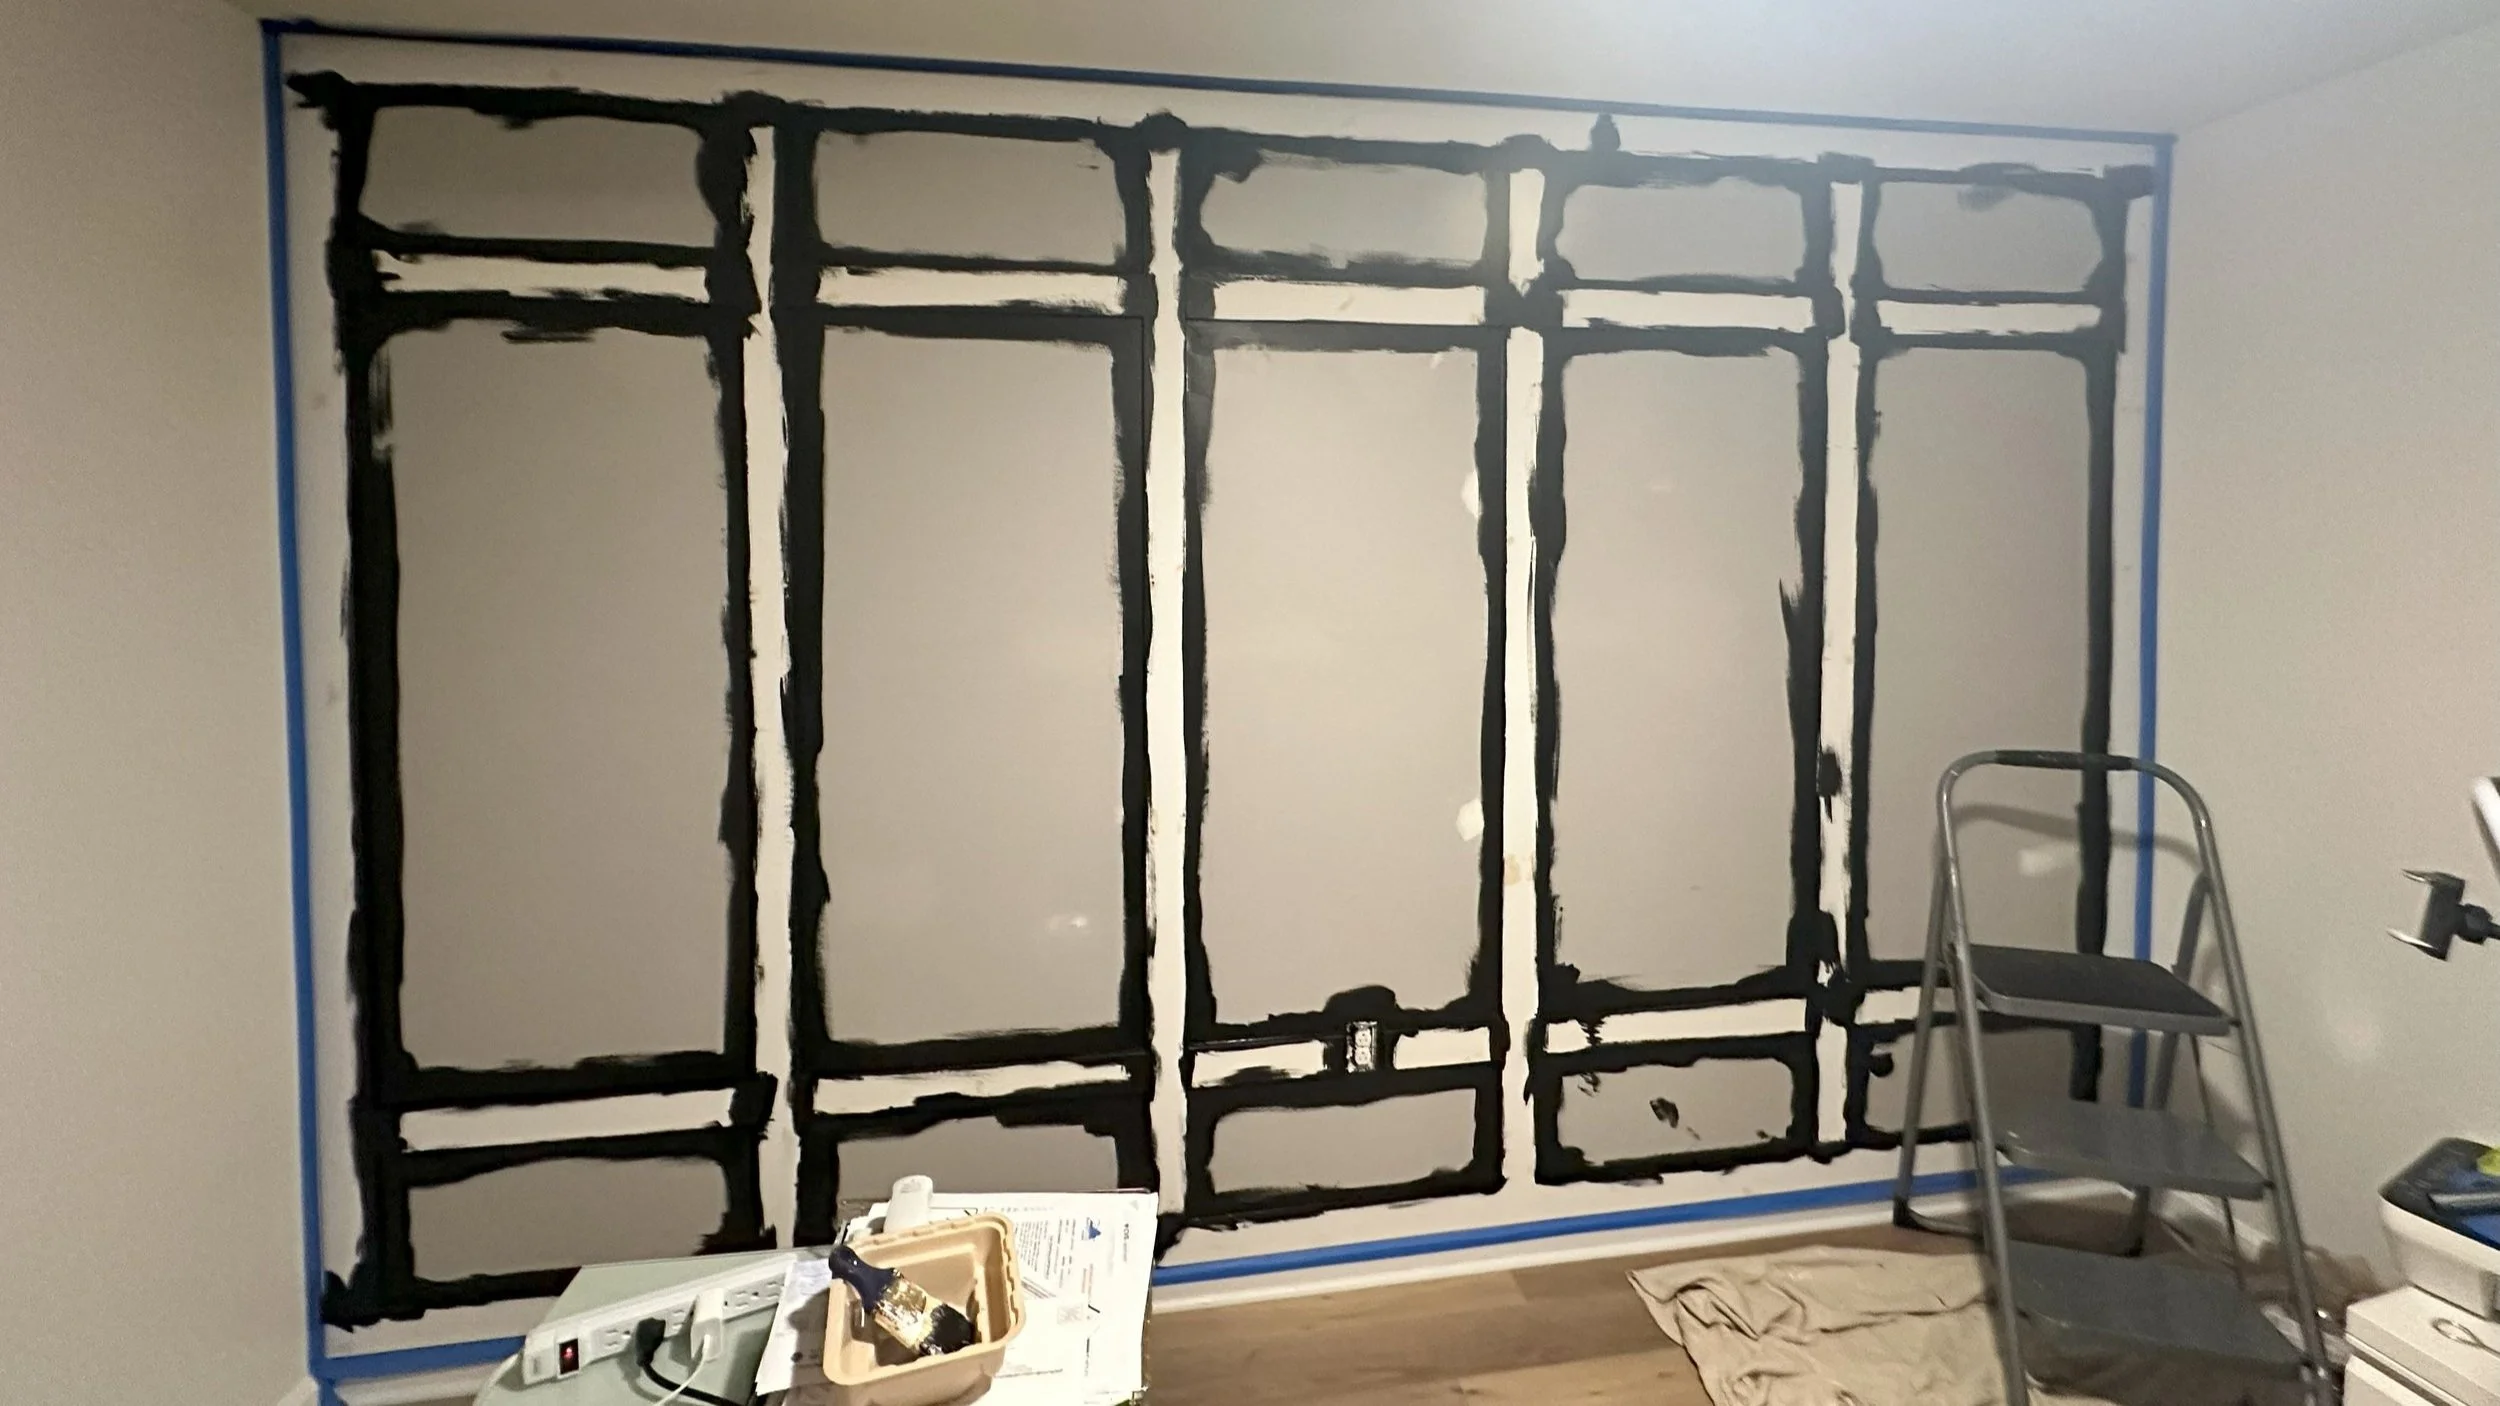
3. Cut the MDF Trim
Measure and cut: Use your measuring tape to determine the lengths of each piece of trim. Cut them to size with a miter saw. DO NOT CUT ALL TRIM TO LENGTH AT ONCE. You will likely discover that you have uneven walls / ceilings that may throw you off even 1/8” or more, creating pieces of trim that are too short.
Miter the edges: For corners or angled cuts, use a miter saw to ensure the trim fits tightly at joints.
Always measure two times, maybe even three times if you are anything like I am. Also, take into consideration of your blade width as placement of blade cut on your mark does matter.
I began framing each side of wall first, then started the base. Notice I did not remove the original baseboard. That is a personal preference. Since my wall was going to be painted black I decided to go through the trouble and leave the baseboard to match its surroundings.
4. Install the Trim
Attach the trim: Start with the border or largest sections. Apply the trim to the wall using a nail gun or hammer with finishing nails.
Ensure alignment: Use a level to make sure each piece is straight before securing.
Continue with the design: Install the rest of the trim pieces, following your layout and pattern.
5. Fill and Sand
Fill nail holes: Use wood filler to fill the holes left by the nails. Let it dry completely.
Sand the filled areas: Smooth the surface using sandpaper for a clean, finished look.
6. Caulk the Gaps
Caulk the edges: Use caulk to fill any gaps between the trim and the wall for a seamless finish. Using a wet finger works best for me. Wearing gloves is not the best for this application (I learned the hard way). Let the caulk dry according to the manufacturer’s instructions.
7. Paint the Wall
Prime if needed: If the MDF or wall has a dark color, consider applying a primer before painting.
Paint the accent wall: Apply your chosen paint color to the wall and trim. Use painter’s tape around the edges to prevent paint from getting on adjacent walls or surfaces.
Apply a second coat: If necessary, add a second coat of paint for full coverage; especially when painting dark over light or if you painted a satin or matte finish over eggshell. A third coat may even be required.
8. Finishing Touches
Remove painter’s tape: Carefully peel off the tape after the paint is dry.
Touch-up: Inspect the wall for any areas that may need additional touch-up or sanding.
Cut in with a angled paint brush, Wooster Brush is my favorite to tackle this job. It is smooth and less strokes to get the job done.
(I am an Amazon Associate and therefore I may earn a couple of bucks should you purchase using the link enclosed.)
Tips:
MDF trim is flexible and easy to work with, but handle it carefully to avoid dents or damage.
Consider using a paint sprayer for a more even and professional finish, especially for intricate patterns.
If you're going for a more modern look, painting the entire wall (trim included) the same color can make the trim stand out in a subtle way.
You now have a striking accent wall to transform your space, Congratulations!